

In your quest for learning python and web development, you might have come across Django as a means of building your websites using python.
It is true, python learners who decide to venture into web development always rely on frameworks such as Django and flask.
Django is a high-level Python framework designed to help you create scalable, neat, and maintainable websites. It is a free and open-source technology that will help you avoid all the hassle of building useful websites.
It is also considered a server-side framework. This means it allows you to work on the logic side of your website.
Django is preferred for a number of reasons. Some of these reasons include:
It is secure
Django provides security through different functionalities such as user account and password protection.
It is Versatile
You can use Django to build ANY type of website as well as pair it to any other client-side framework and it will work just fine.
It is Maintainable
Django uses a principle called Don’t Repeat Yourself (DRY). This principle is used by developers to cut out duplication in writing code through grouping related functionality into applications that can be reused time and time again.
Additionally, Django has great documentation, known as Django Documentation, that will provide all the answers on how to effectively use this great framework.
If you are interested in learning how to build websites with Django, this article will guide you through setting up your first project.
In the end, you will learn how to,
- Set up a virtual environment
- Install Django
- Create and get into your project folders
- Create a Django project
- Run Your First Server
Getting Started
It is important to note that you will have to do most things, including creating actions and commands through code. Most of your code will go to your preferred code editor.
The other code will come in the form of simple instructions that will go on your command prompt (CMD) or terminal for Mac users.
The CMD/terminal is where you execute most of your commands and installs for the project to run.
To access CMD for windows
Type cmd on the search box and the bottom left side of your screen. Pick the command prompt App option.
To access your Terminal on Mac
Click on the Launchpad icon on the dock and search for Terminal on the search box, then click on the Terminal option.
Note: It is possible to run your commands through your code editor. Some code editors also provide you with a functional terminal where you can run your installs and commands.
However, it is also important to learn how to run your Django project in CMD.
Step 1: Creating a Virtual Environment
A virtual environment is just that; an environment where you can create your project in a tidy manner. Think of it like a shelf with many levels.
Your computer is the whole shelf while a virtual environment is an individual shelf. Here, you can decide to add books from particular authors in a way that makes the most sense to you.
By learning how to create a virtual env, you will be making your work easier and allowing yourself to run and create multiple projects without mixing stuff up.
To start off, create a virtual env by typing this command into your CMD.
mkvirtualenv <name>
(Replace with your preferred name for your virtual env.)
Step 2: Installing Django
Time to install Django. This installation allows you to work with the latest version of Django.
On your CMD, type:
pip install django
Note: It is possible to work with other versions of Django if you like. Do this by adding your preferred version at the end of the pip command. For example,
Pip install django==3.7
Do I have to Install Django for Every Project
Preferably, Yes.
First, remember that we are creating a virtual environment and installing Django into it. This virtual env is only accessible for the particular project we are working on.
Therefore, if you were to start another project using a different virtual env, you would have to download Django again.
And why not download Django to our computers once and for all?
Because:
Django is forever being improved by awesome developers, so there are always new versions. Django documentation will always let you know what version is the latest.
There also comes a time when you might want to use a particular version depending on the project you are working on.
This is why we install Django in the virtual environment and not on our computers. This way, each project has its own version of Django.
Step 3: Create a Folder
It is now time to create a folder for your project. This folder will contain the entire project.
On your CMD, type:
mkdir <project name>
(Remember to replace with the preferred name of your project.)
mkdir means Make Directory. It is a command used to create the parent folder for your project.
Then type cd into your cmd/terminal to get into the directory you have just created. (cd means change directory).
Step 4: Create a Project
Now that you are inside your folder, it is time to work with Django to create a project. On your cmd/terminal, type;
django-admin startproject <projectname>
To access the project, type:
cd <projectname>
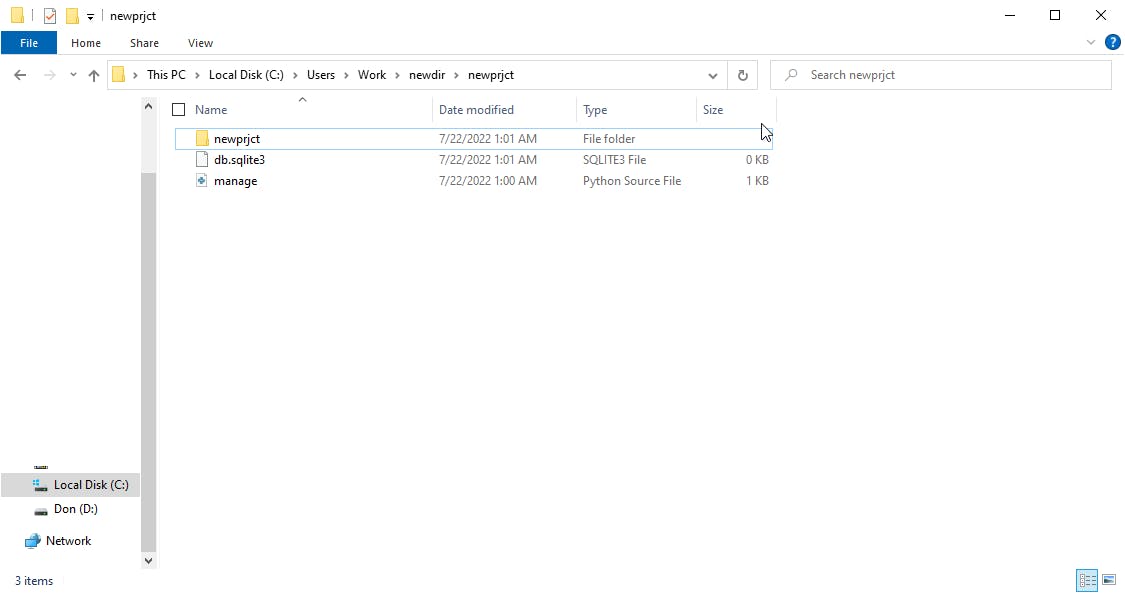
If you check the folder in the computer’s storage, it should look like this:
Step 5: Set up Your Server
Once you have your project in order, it is now time to set up your server. The server translates what you are doing at the backend into something you can see on your browser.
On your cmd/terminal:
python manage.py runserver
This will give you the server address: http://127.0.0.1:8000/. This is a free production server that will allow you to see what is happening as you build your code.
Copy the server address and paste it into your browser. You should see something like this.
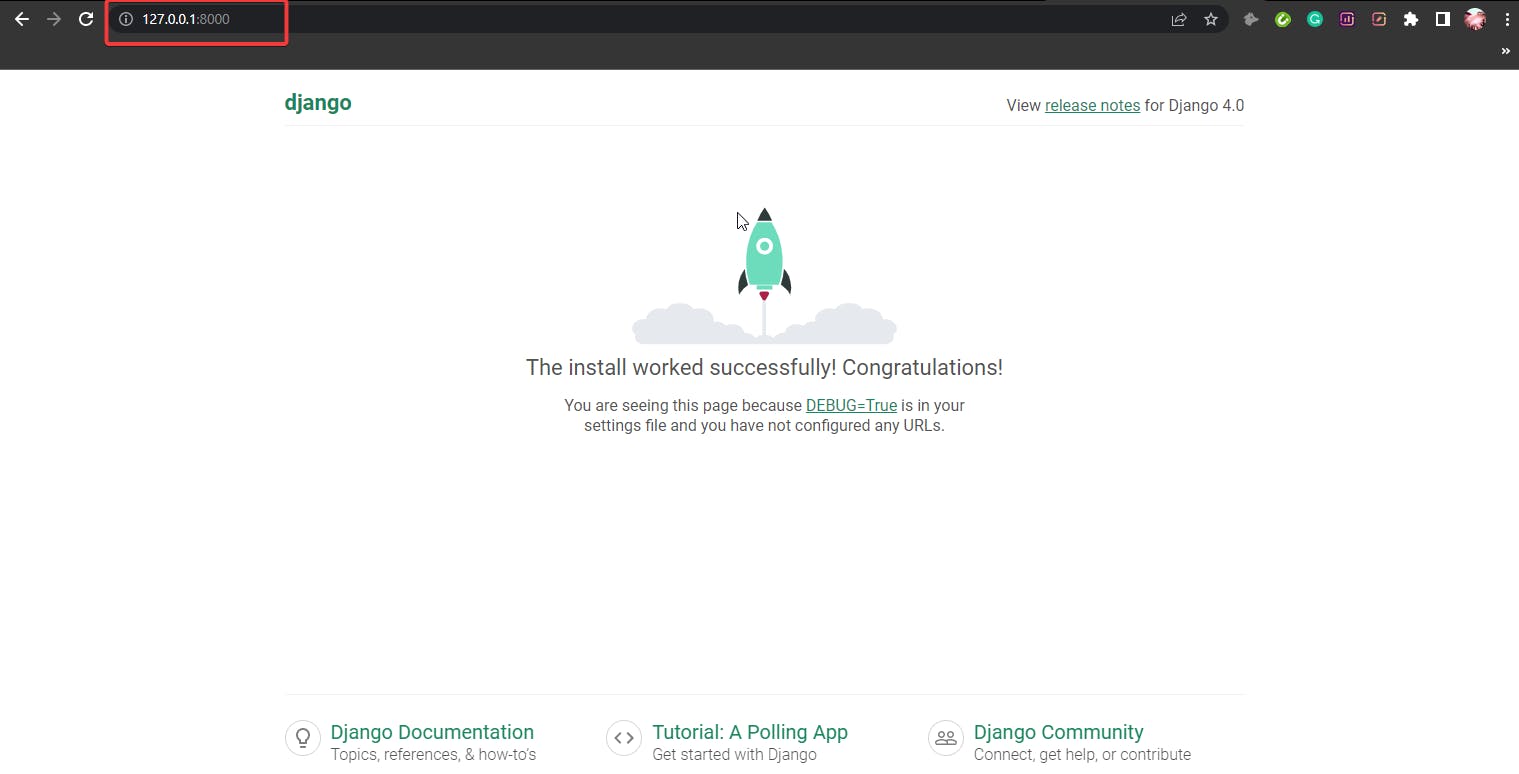
There you go, your server is running and your first ever Django project is live. You are now ready to start building web apps using this amazing framework.
Conclusion
Setting up our first Django project can be scary and exciting at the same time. It is even scarier when you start seeing errors on the terminal because maybe you missed a step.
However, this should not stop you from pursuing your dream. Soon, you will be able to not only create a project but build your first app and eventually even work on other Django projects with source code.